Painting Ducati 1098 Mirrors...
Color matching the mirror housings on your Ducati 1098 gives the bike a much
cleaner look.
Getting the mirrors apart for painting them is not the issue. Putting them back
together is the fun part....
Below are detailed instructions how to improve the looks of your 1098...
This method does not involve any ovens or such.... just three fat dudes, a
steady hand and a case of Corona Light...
Taking the Mirrors Apart:
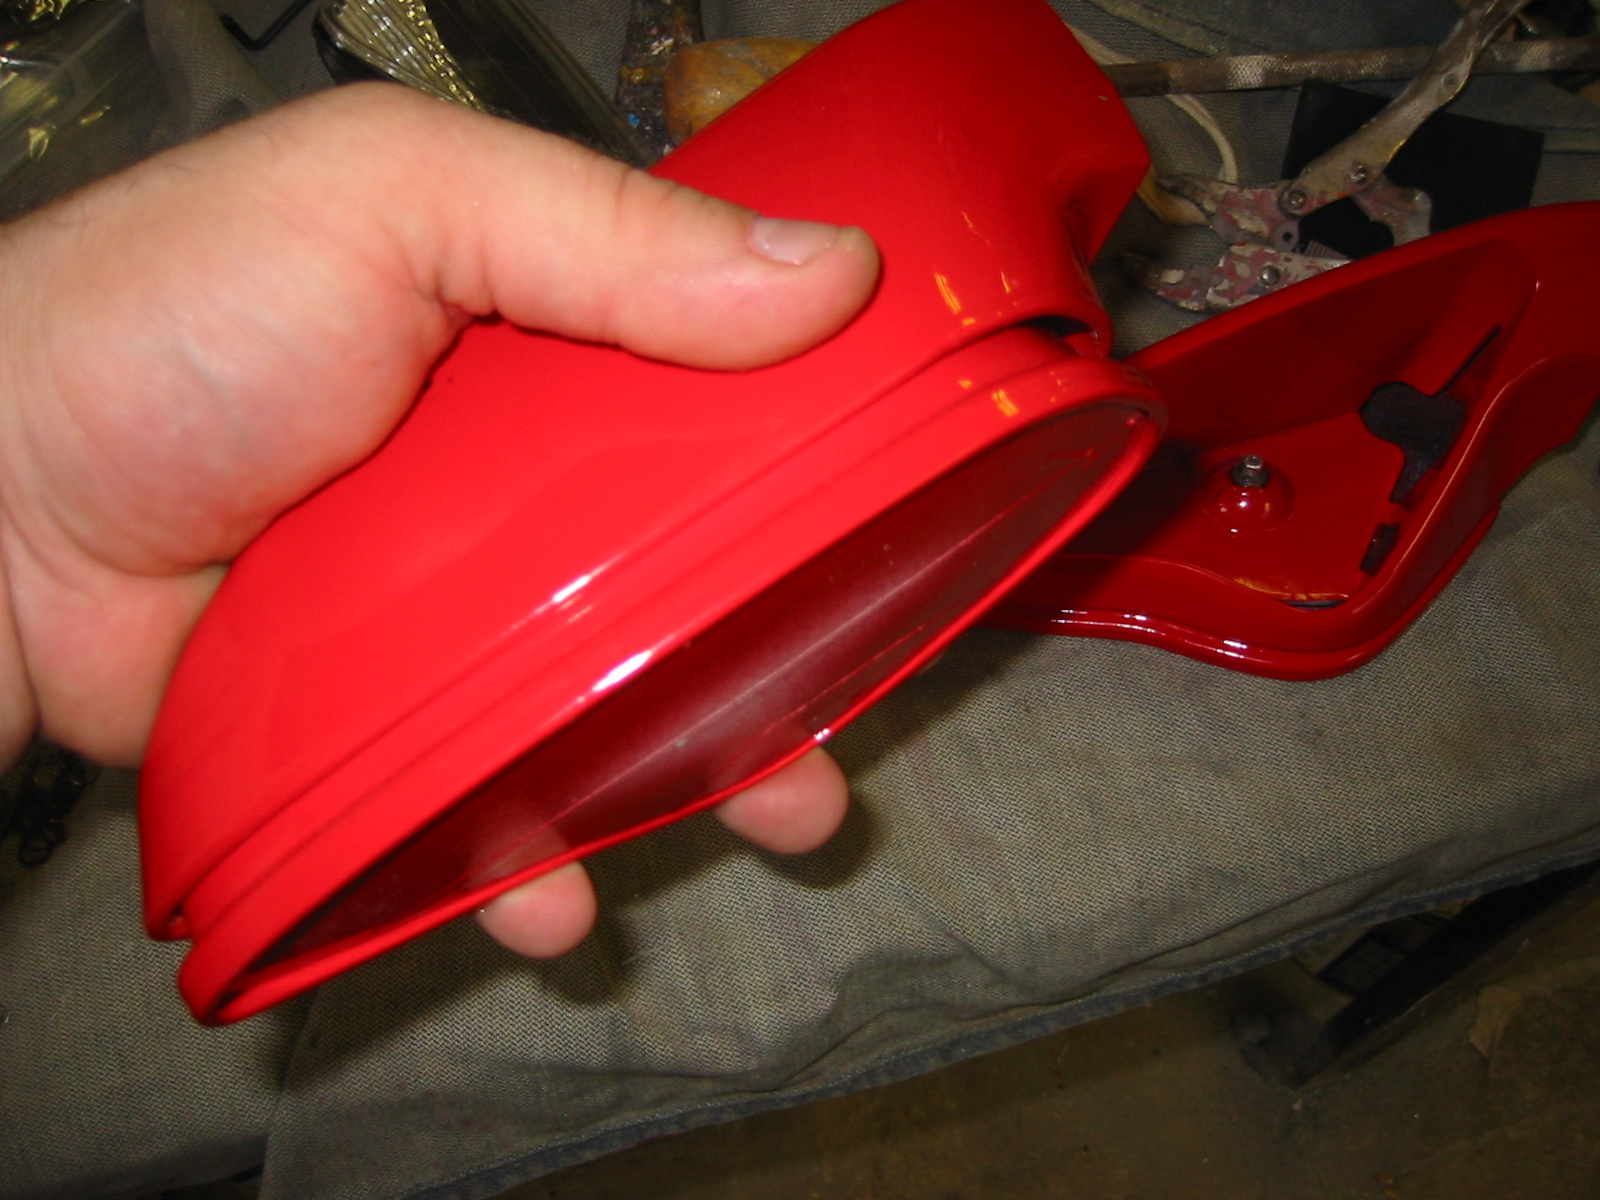
1) Pop put lens for turn signal, remove C-clip that holds the mirror assembly to the base, you'll likely launch this clip into low earth orbit or snap it in half....don't worry, C-clips cost a few pennies. Be sure to hold the post above the C-clip with a micro-needle nosed vise grip as once the clip is removed, the internal spring will drive the bottom of the post into the back of the mirror glass, most likely cracking the mirror.2) Separate the mirror base from the mirror stem by removing the two screws, you should be left with three pieces for each mirror, the base, the stem and the part that actually still retains the mirror.
Painting the Mirrors:
I'm not going to get into the painting aspect of it simply because every painter has his own methods and materials.1) I personally just took two inch tape, carefully masked off the mirror itself...using the back side of a straight razor blade to push the tape gently down into the corners where the mirror meets the plastic, then flip razor around and carefully cut the tape directly in the corners for a perfectly clean mask.
2) Scotchbright all plastic surfaces thoroughly with red scotch pad. I used a white non sanding epoxy sealer suitable for plastic, seal (paint) the mirrors.
3) Color coat them with red, yellow or black to match your bike.
4) Clear coat them.
Putting the Mirrors Back Together:
Now the fun begins......1) Make sure the Corona Lights are properly iced down.
2) After the mirrors are cured, place the piece that holds the mirror, mirror side down on a thick cloth (to protect the paint).
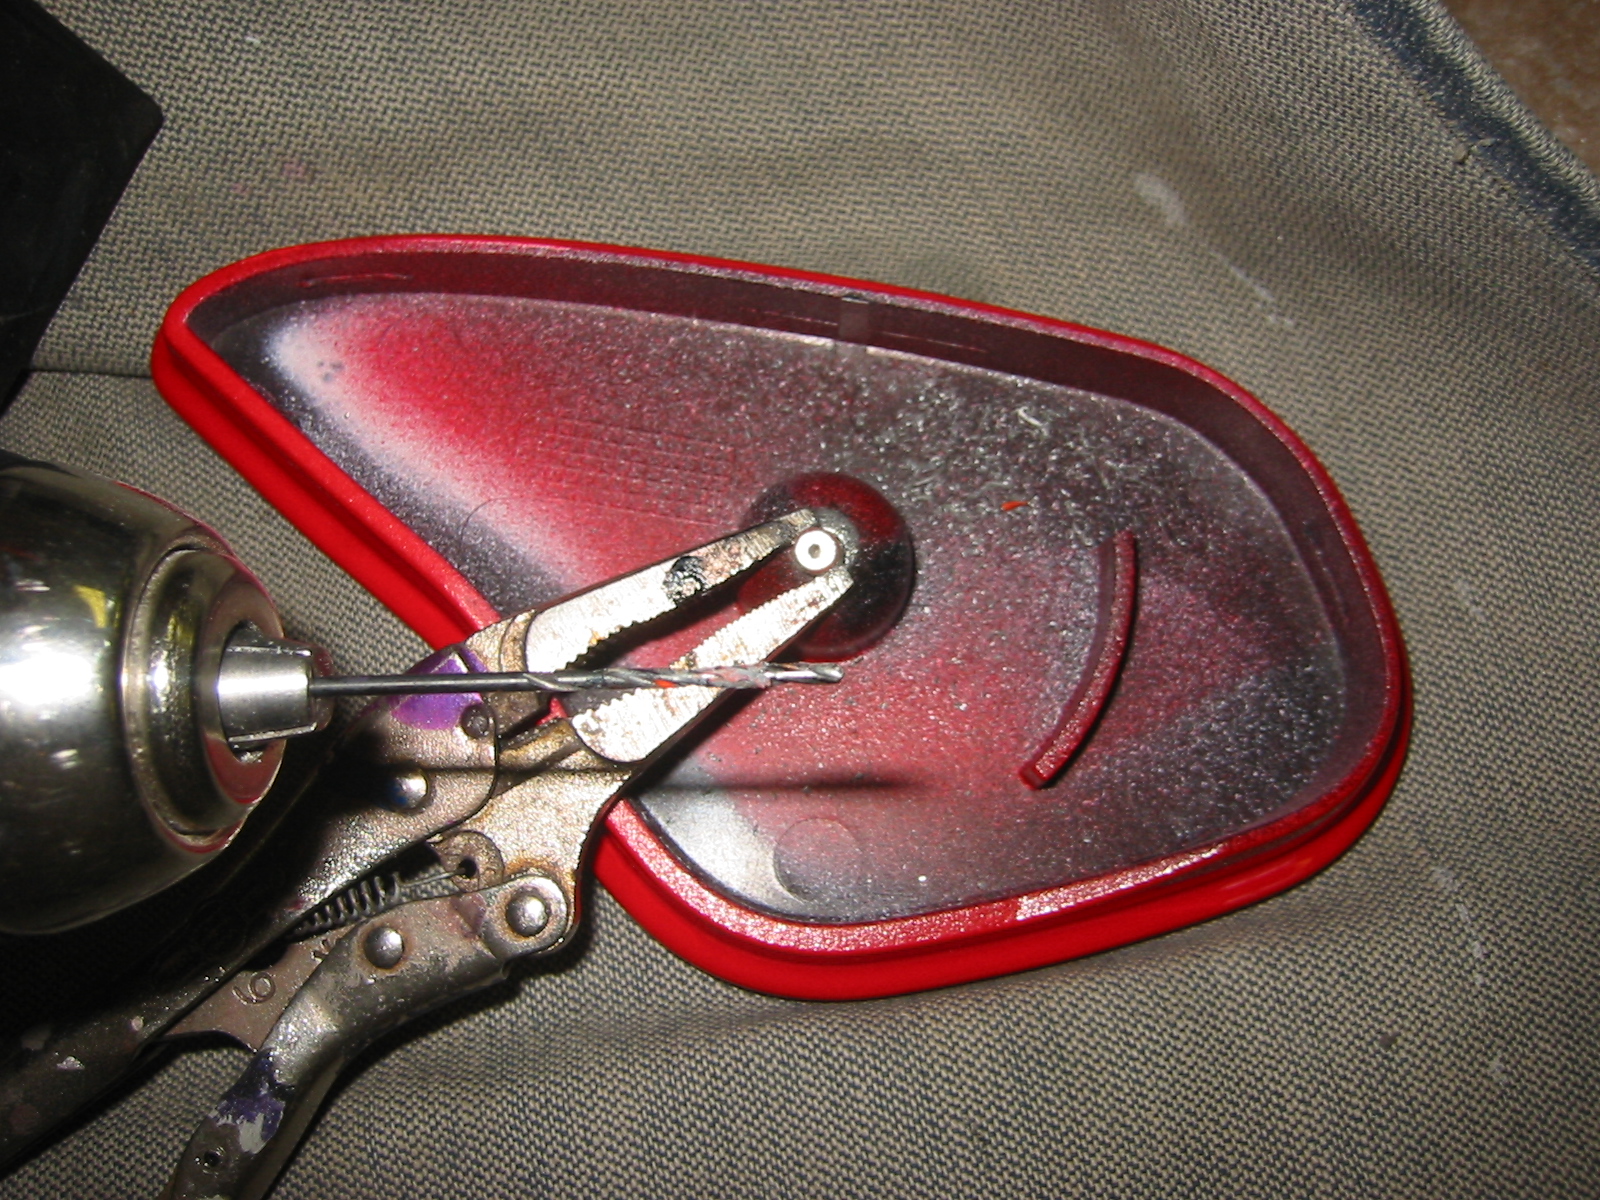
3) I took a very small drill bit and grabbed the shaft that the C-clip previously was attached too....and locked a micro-needle nosed vise grip onto the shaft. Carefully drill down into the center of the shaft paying attention to keep drill bit centered so as not to drill a "crooked hole". Drill down approx 1/4 inch. If you drill too far you'll go through the shaft and crack the mirror.
4) Get a small bottoming tap that corresponds with the small drill bit you used...and lube the hole with tap oil... tap the whole. Screw in small machine screw. Keep in mind that you should keep work area very clean and free of metal chips so as not to ruin the new paint job.
 5)
OK, next get one fat dude to securely hold the mirror assembly face down on a
soft surface.
5)
OK, next get one fat dude to securely hold the mirror assembly face down on a
soft surface.
6) Get second fat dude to place the mirror stem in place over the back side of the mirror assembly....
7) Second fat dude must then poke the shaft through the hole and clamp the micro-needle nosed vise grip onto the threaded screw, pulling the shaft through the hole far enough so that the third fat dude can take another micro-needle nosed vice grip with the new c-clip you bought at Home depot....and properly place it back into the groove on the shaft.
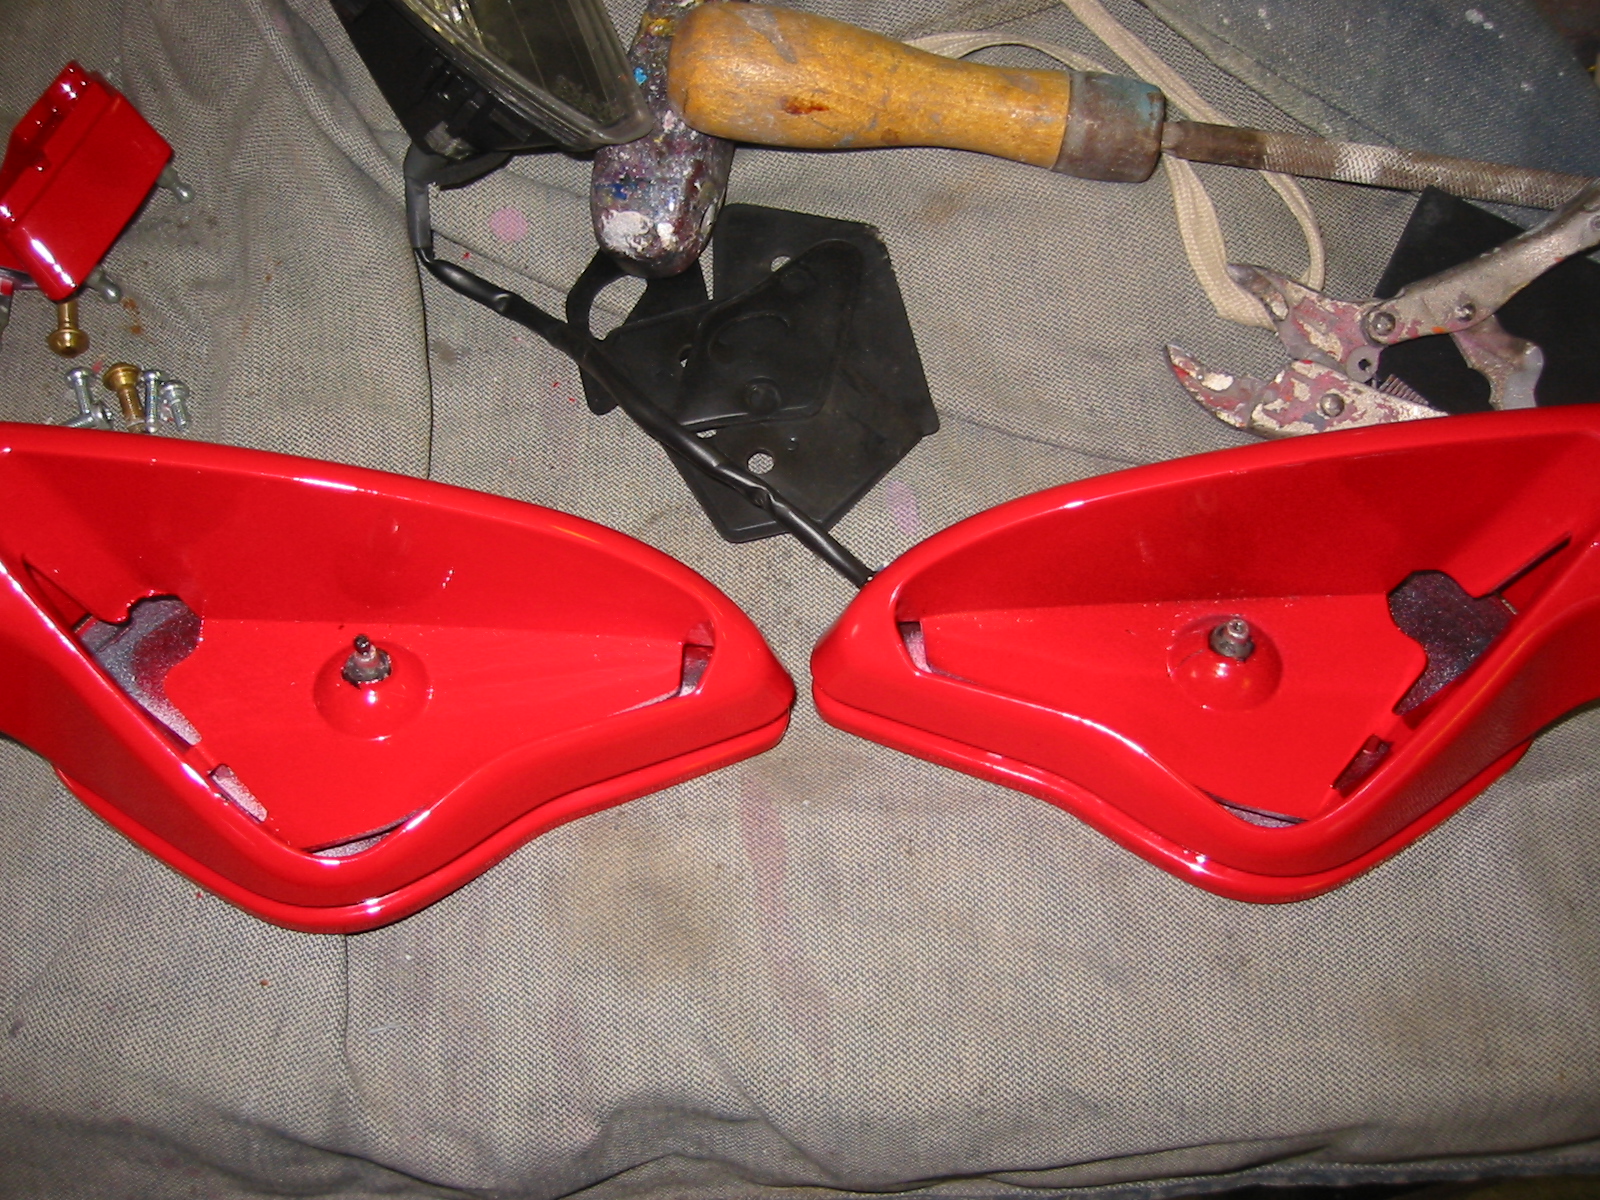
8) Sit back with your two fat friends and drink the case of Corona...thanking your lucky stars that this ball busting method worked at all....because explaining to your customer that you took his mirrors apart, painted them and are too dumb to figure out how to get them back together will set you back twenty spaces in CandyLand.
You now have a set of mirrors that look awesome... and are not "half-way" painted.
I charge $300.00 to do this.
If you bring me the mirrors taken apart...and will put them back together yourself...
I'll charge you $60.00 to paint the 6 pieces.